
How to
Replacing the CMOS Battery in AD v3
You replace the CMOS battery in AD v3 to be able to boot up AD v3 when the existing battery is dead.
Remove the AD v3 back cover.
Loosen the 14 screws using a Phillips #1 (PH1) screwdriver.
Remove the back cover.
action_zoom_plus_stroke 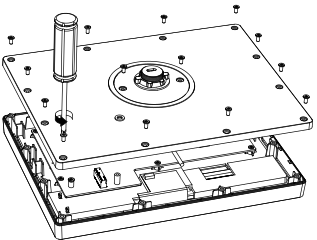
Disconnect the existing CMOS battery.
Carefully unplug the female connector of the CMOS battery from the male connector on the PCBA.
Put the unplugged connector with its two wires to the side, out of the way.
Important:Do not try to remove the disconnected CMOS battery but leave it where it is mounted on the other side of the PCBA.
action_zoom_plus_stroke 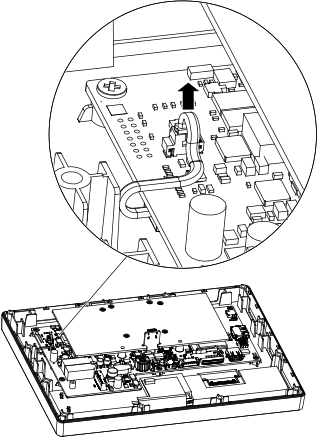
Remove the release liner from the foam tape and attach the tape to the new CMOS battery.
action_zoom_plus_stroke 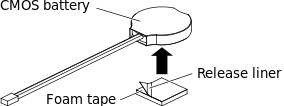
Remove the release liner from the foam tape on the CMOS battery.
action_zoom_plus_stroke 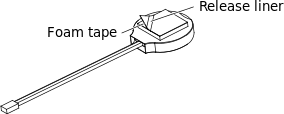
Connect the new CMOS battery.
Carefully plug the female connector of the CMOS battery into the male connector on the PCBA.
Using the foam tape, attach the CMOS battery to the integrated circuit located near the male connector on the PCBA.
action_zoom_plus_stroke 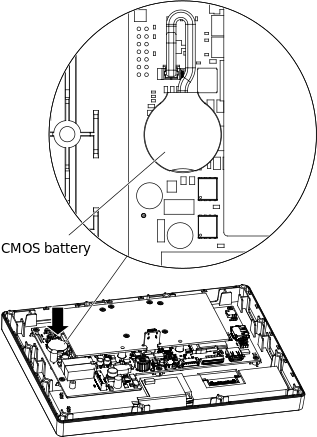
Replace the AD v3 back cover.
Ensure that the gasket is properly fitted into the groove of the front cover.
Fit the back cover to the front cover.
Tighten the 14 screws using a Phillips #1 (PH1) screwdriver. Ensure that the screws are fully tightened. Use the following recommended screw tightening torque: 0.4 Nm (3.5 lbf.in).
action_zoom_plus_stroke 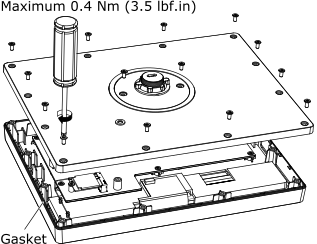
You can now install AD v3 on the cabinet. For more information, see Installing AD v3 on a Cabinet .
 AD v3 Installation
 Installing AD v3 on a Cabinet
 Connecting AD v3 to a SmartX Server and a 24 VDC Power Supply

