How to
Creating a Monthly Report Schedule
You create a monthly report schedule when you want the schedule to run a report on a monthly basis on the first or last day of the month, or on both the first and last day of the month at a specified time.
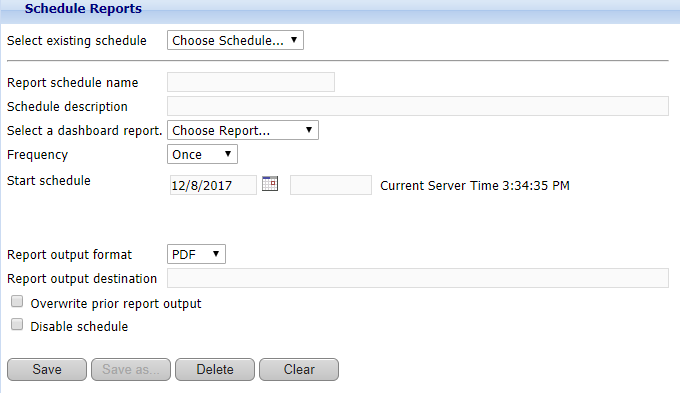
In WebReports, on the menu bar, click Schedules .
In the Select existing schedule box, select New Schedule .
In the Report schedule name box, type a name for the schedule.
In the Schedule description box, type a description for the schedule.
In the Select a dashboard report box, select the dashboard report that you want to schedule.
In the Frequency box, select Monthly .
In the Start schedule box, enter the date and time to activate the schedule.
Select the First box to make the schedule run on the first day of every month.
Select the Last box to make the schedule run on the last day of every month.
In the Report output format box, select the file format to be used when the report is generated.
In the Report output destination box, type the directory path for the report output.
Note:The report is written to the specified destination using the System account of the Reports Server. If you plan to save scheduled reports to a network drive, ensure that the System account has write access to the network drive.
Select the Overwrite prior report output box to keep only the most current copy of the report output.
Select the Disable schedule box to disable the schedule when not used.
Click Save .
 Dashboard Reports
 Schedules for Dashboard Reports
 Report Schedule Frequency
 Schedule Reports Page


