Explicación de procesos
Creating a Workspace
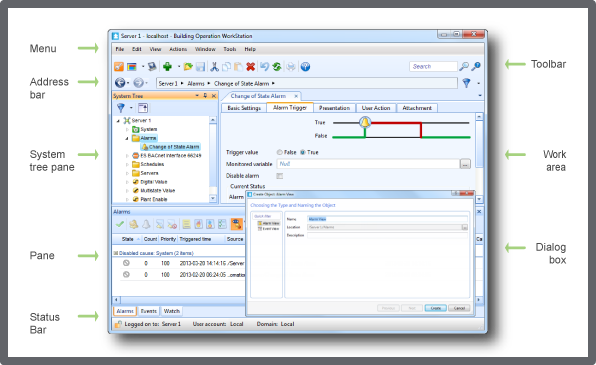
You create a customized workspace so that the WorkStation windows and panes are tailored to meet the operational needs of a user or a user account group.
You need to log off from the EcoStruxure BMS server for the changes to take effect.
In WorkStation, in the System Tree pane, select the EcoStruxure BMS server you want to configure.
Click the Control Panel tab.
Click Account management .
In the Domain box, select the domain where you want to create the workspace.
In the Workspaces area, click Add .
In the Create Object dialog box, in the Name box, type a name for the workspace.
In the Description box, type a description for the workspace.
Click Next .
In the Workspace Configuration page, select Visible to display the standard toolbars and menus in the workspace.
In the Root path (Applies to Address Bar and System Tree) box, type the path to the folder that you want to be the root folder for the System Tree and the Address bar.
Click the Add button
to add panes to the workspace.action_zoom_plus_stroke 
In the Create Object dialog box, in the object type list, select the type of pane you want to add to the Work area.
In the Name box, type a name for the pane.
In the Description box, type a description for the pane.
Click Next .
In the Pane Configuration page, in the Default dock position box, select the location of the pane for display in the WorkStation window.
In the Default visibility box, select Hidden to make the pane available only from the View menu and not open in the Work area.
In the Display name box, type the name to be displayed on the pane.
In the Initial path box, enter the path to the object you want to display in the pane.
Click Create .
In the Workspace wizard, click Create .
 Workspace Components and Customization
 Adding a Component to a Workspace
 Removing a Component from a Workspace
 Editing the Description of a Workspace
 Editing the Layout of a Workspace
 Workspace – Content Tab
 Workspace – Summary Tab
 Edit Layout Workspace
 Workspace Components and Customization
