earth_america
user_standard Iniciar sesión
action_search_stroke
earth_america
Log on to rate and give feedback 1 2 3 4 5 Log on to rate
0
Explicación de procesos

Explicación de procesos


Productos AS-C, AS-B, Enterprise Server, AS-P, WorkStation, Project Configuration Server, Project Configuration Tool
Funcionalidades: Tendencias
Versión del producto: 1.8
13/10/2016

Creating an Interval Trend Log

You create an interval trend log to record a value of a variable at specified and regularly occurring increments of time.

Mostrar más
action_close

​The interval trend log collects data at a specific time interval. Each logged value is stored as a record in the trend log. Use this trend log when the logging interval is less than 1 hour.

You create interval trend logs using WorkStation or WebStation. In WorkStation, you configure the properties of the interval trend log to meet the specific needs of your site. 

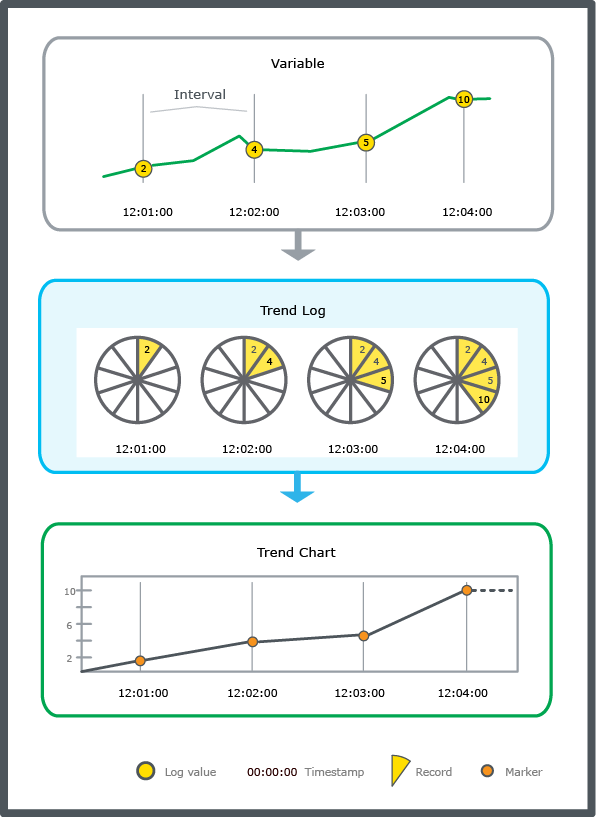
For example, in the figure below, the interval trend log records a variable every minute. The records are printed in a trend chart. The interval trend log does not record the values between the intervals.

 
action_zoom_plus_stroke Interval trend log schematic.
Figura: Interval trend log schematic.

The interval of the interval trend log is aligned with the activation time of the trend. For example, if the activation time is 09:01:00 and the interval is 15 minutes, the trend will log at 09:16:00, 09:31:00, 09:46:00, and so on.

Interval Trend Log Delta

An interval trend log with delta can reduce the storage of similar records, and may not fill up the storage capacity as quickly as an interval trend log with no delta.

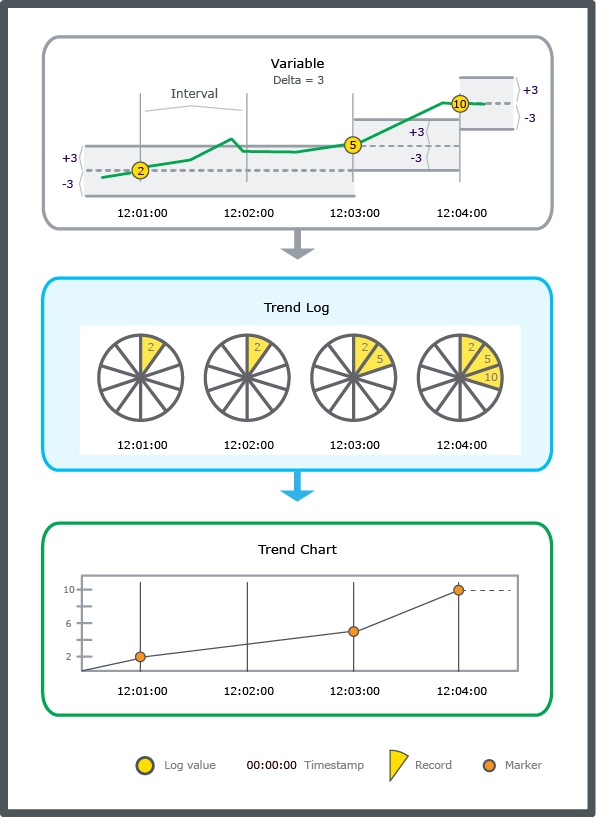
An interval trend log with delta checks the monitored value at each interval and records the new value if it differs from the previously recorded value by more than the delta. Delta is the difference between the current variable value and the last log value. To log a variable according to the time interval, use a delta of zero.

For example, in the figure below, the interval trend log records a variable every minute but only if the variable exceeds or falls below the delta of 3. The records are printed in a trend chart. Notice that the interval trend log with delta does not record the values between the intervals, or on intervals where the variable is within the delta.

Aviso
  • To log a variable only according to the time interval, set Delta to zero.

 
action_zoom_plus_stroke Interval trend log with delta schematic.
Figura: Interval trend log with delta schematic.

If an interval trend log has a delta and a calculation method that uses periods, make sure the period contains the required amount of records to generate a correct calculation. If the value does not differ from the previously logged value by more than the delta within the period, then none or too few values are recorded for the calculation.

Aviso
  • Adapt the period so it contains the required amount of records to generate a correct calculation.

  • If a calculation method is connected to an interval trend log with delta, make sure that the period and delta are adapted for the calculation.

To create an interval trend log
  1. In WorkStation, in the System Tree pane, select the folder or SmartStruxure server where you want to create the trend log.

  2. On the File menu, point to New and then click Trend .

  3. In the object type list, select Interval Trend Log .

     
    action_zoom_plus_stroke
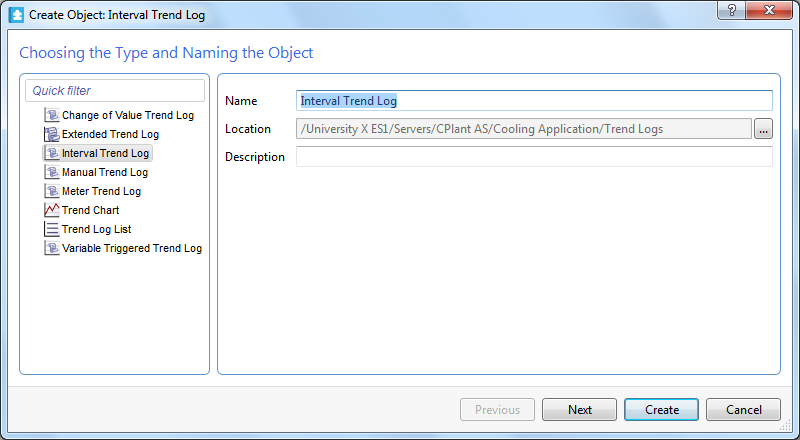
  4. In the Name box, type a name for the trend log. ​

  5. In the Description box, type a description for the trend log.

     
    action_zoom_plus_stroke
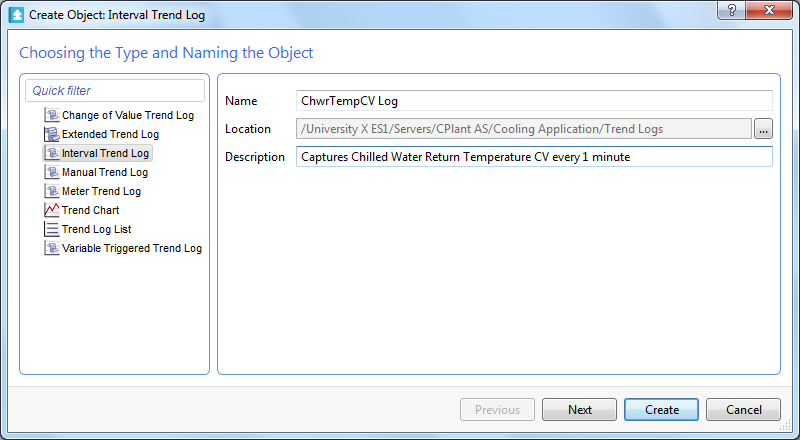
  6. Click Next .

  7. In the Logged variable box, enter the variable that you want to log.

     
    action_zoom_plus_stroke
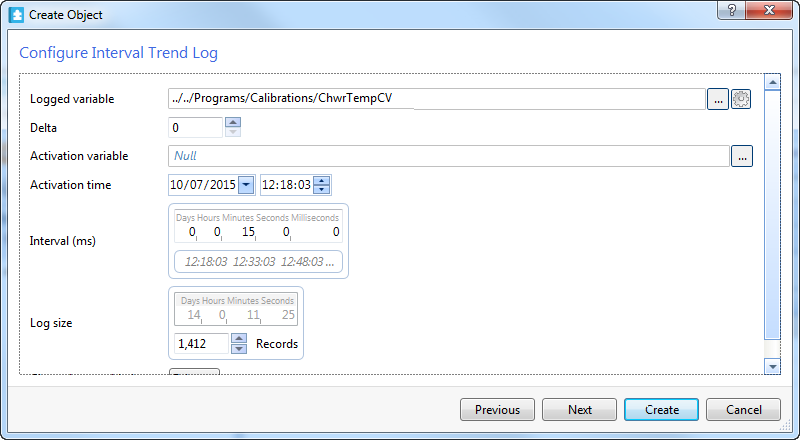
  8. Click the Set unit button

     
    action_zoom_plus_stroke
    .

  9. Select a unit for the trend log values.

     
    action_zoom_plus_stroke
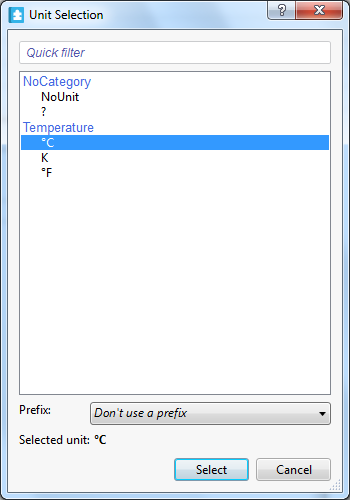
  10. In the Prefix box, select the prefix of the unit.

  11. Click Select .

  12. In the Delta box, enter the minimum value change that triggers a new record.

  13. In the Activation variable box, enter a variable to start recording values when the acitvation variable is true

  14. In the Activation time box, enter the exact time for the recording to begin.

  15. In the Interval box, type the log frequency.

  16. In the Log size box, type the log size to be stored before old values are overwritten.

  17. In the Available trend storage box, check that the available number of records is not exceeded.

  18. In the Clear when enabled box, select True to clear the trend log every time the trend log is enabled.

  19. Click Next .

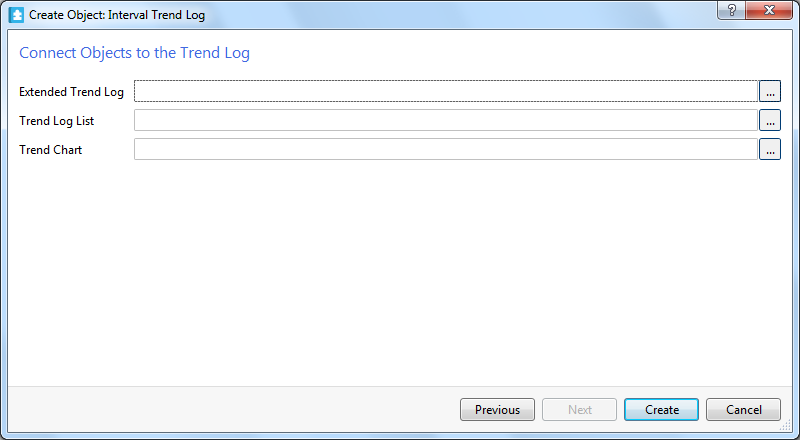
  20. In the Extended Trend Log box, click the Browse button

     
    action_zoom_plus_stroke
    to create an extended trend log and connect it to the trend log.

     
    action_zoom_plus_stroke
  21. In the Trend Log List box, click the Browse button

     
    action_zoom_plus_stroke
    to create a trend log list and connect it to the trend log.

  22. In the Trend Chart box, click the Browse button

     
    action_zoom_plus_stroke
    to either create a new trend chart or connect the interval trend log to an existing trend chart.

  23. Click Create .

  • Interval Trend Logs
  • Trend Units
  • Trend Log Activation
  • Log Record Storage
  • Create Object Wizard – Naming the Object Page
  • Create Trend Log Wizard – Configure Interval Trend Log Page
  • Create Trend Log Wizard – Connect Objects to the Trend Log Page
  • Creating an Extended Trend Log
  • Creating a Trend Log List
  • Creating a Trend Chart that Monitors a Trend Log Series