You can configure to run WebStation in Internet Explorer in kiosk mode when you want to limit the users’ access to Internet Explorer.
When kiosk mode is used, the toolbar, menu, and right-click menu, are disabled. Most keyboard shortcuts, such as alt + F4 to close Internet Explorer, is still working.
Use the guest log on if you want the user to get immediate access to WebStation in kiosk mode.
For more information, see Guest Logon in WebStation
.
Configure WebStation to Run in Kiosk Mode
To be able to run WebStation in kiosk mode, you decide which object in WebStation the users' will have access to, such as a graphic, a viewer, or a panel. You can of cause also open the whole WebStation workspace in kiosk mode but the most common way to use kiosk mode is to just open one object, for example, a graphic.
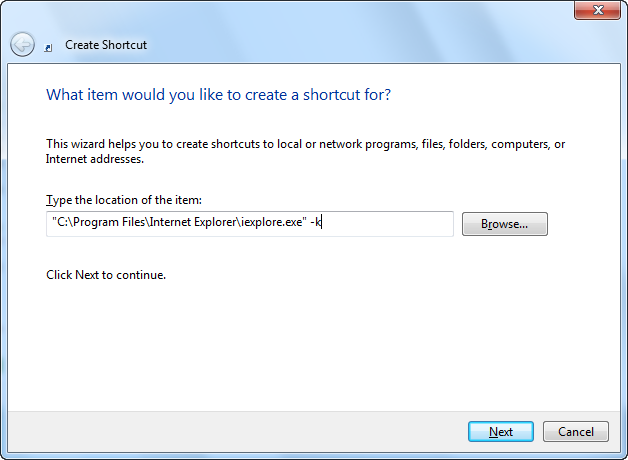
The easiest way to configure WebStation to run in kiosk mode is to create a shortcut to Internet Explorer in Windows and add the command for kiosk mode (-k).
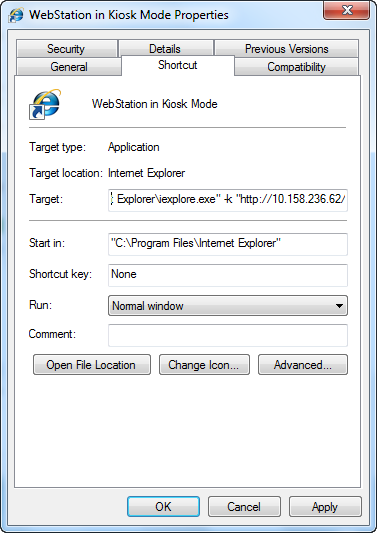
After you have created the shortcut, you open the object you want the users' to have access to in WebStation in a new window. Then you copy the full address to the object and paste it, within quotation marks, after the command –k in the target box in the Shortcut tab in the properties dialog box of the Shortcut.
Use the following syntax in the Target box in the shortcut properties dialog box when you want to use kiosk mode:
action_zoom_plus_stroke

Remove the Toolbar when a Graphic is Opened in Kiosk Mode
When you use kiosk mode to open a graphic and you do not want the user to see the Reset zoom menu, you can hide it with the hide toolbar command, <>HTB<>. The commando is added after the new_window command. The <>HTB<> can also be used without using kiosk mode, for example when you want to add a shortcut to a specific object.
Use the following syntax in the Target box in the shortcut properties dialog box when you want to hide the toolbar:
action_zoom_plus_stroke


 WebStation in Kiosk Mode

