Comment faire pour
Configuration d'un journal de tendance d'intervalle
Vous configurez les propriétés d'un journal de tendance d'intervalle en fonction des besoins uniques de votre site.
Dans WorkStation, dans le volet arborescence du système , cliquez sur le journal de tendance d'intervalle que vous souhaitez configurer.
Dans le menu Fichier , cliquez sur Propriétés .
Dans la boîte de dialogue Propriétés, cliquez sur l'onglet Basic .
Éditez les propriétés de base :
Table : Interval Trend Log Properties - Basic Tab
Property
Description
Status
Displays the status of the trend log.
Enabled
Displays True if the trend log is enabled.
Logged variable
Enter the variable you want to log.
Delta
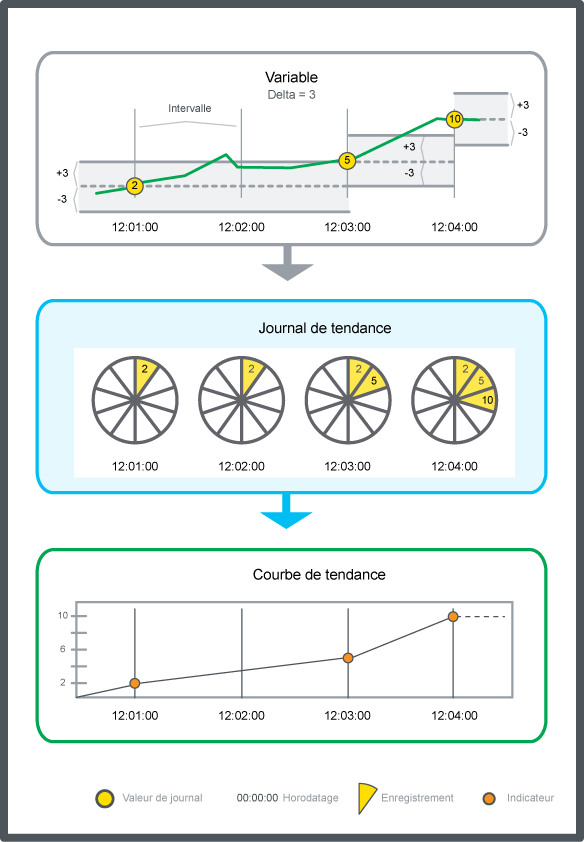
Select the minimum value change that triggers a new record.
Activation variable
Enter the variable that makes the trend log start recording values when the variable is True .
Activation time
Specify the time when the trend log is to start recording values.
Interval
Type how often to log the variable. The interval defines the time between two log records.
Log size
Select the number of records to store before old records are overwritten, including internal records generated by the trend log.
Pour plus d'informations, voir Stockage des enregistrements journaux .
Clear when enabled
Select True to clear the trend log when it is enabled.
Cliquez sur l'onglet Infos compteur .
Éditez les propriétés du compteur :
Table : Meter Info Tab
Property
Description
Is meter log
Select True if the trend log meter function is active.
Pour plus d'informations, voir Fonction de compteur .
Meter change time
Enter the time when the meter was changed.
Meter change user
Enter the name of the user account that changed the meter.
End time
Enter the time when the old meter was replaced.
End value
Enter the value the old meter had when it was replaced.
Start time
Enter the time when the new meter was installed.
Start value
Enter the value of the new meter when it was installed.
Meter constant
Enter the constant of the new meter. If the meter counts in kilo (10 3 ), the constant is 1000.
Min value
Enter the first value of the new meter after roll-over.
Max value
Enter the last value of the new meter before roll-over.
Cliquez sur OK .
 Journaux de tendance d'intervalle
 Boîte de dialogue Configurer - Onglet Opération
 Stockage des enregistrements journaux
 Fonction de compteur
 Modification de l'intervalle d'un journal de tendance d'intervalle

