Como
Creating a Manual Trend Log
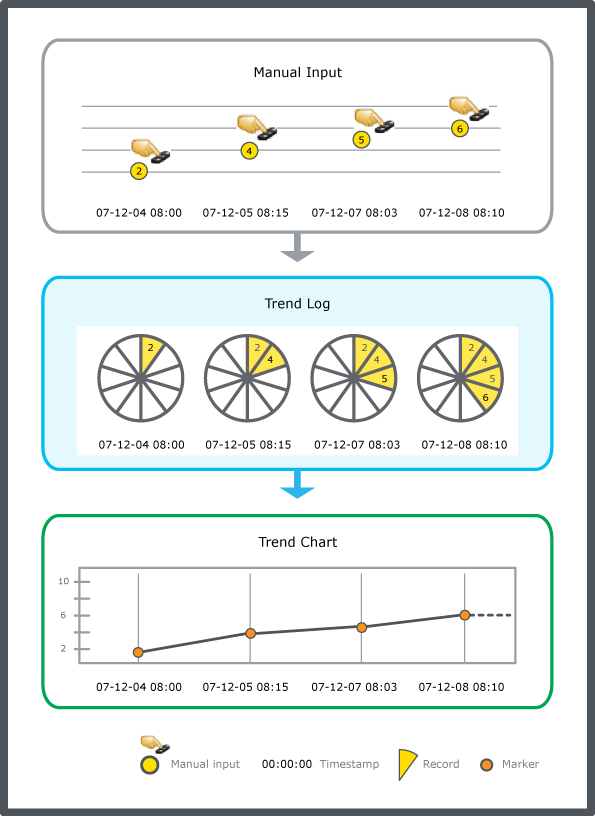
You create a manual trend log that records data that you manually enter.
In WorkStation, in the System Tree pane, select the folder or EcoStruxure BMS server where you want to create the trend log.
On the File menu, point to New , and then click Trend .
In the Create Object wizard, in the object type list, select Manual Trend Log.
In the Name box, type a name for the trend log.
In the Description box, type a description.
Click Next .
In the Configure Manual Log page, in the Unit box, click Browse button.
In the Select Unit dialog box, select a unit for the trend log values.
In the Prefix box, select the prefix of the unit.
Click Select .
Click Next .
In the Initial Meter Settings page, in the Set initial meter box, select True to enable the meter function.
In the Start time box, enter the time when the meter was installed.
In the Start value box, enter the value of the new meter when it was installed.
In the Min value box, enter the first value of the new meter after roll-over.
In the Max value box, enter the last value of the new meter before roll-over
Clilck Next .
In the Connect Objects to the Trend Log page, in the Extended Trend Log box, click the Browse button to create an extended trend log and connect it to the trend log.
In the Trend Log List box, click the Browse button to create a trend log list and connect it to the trend log.
In the Trend Chart box, click the Browse button to either create a new trend chart or connect the trend log to an existing trend chart.
Click Create .
The manual trend log is created in the selected folder. You have to manually add the records to the manual trend log.
 Manual Trend Logs
 Create Object Dialog – Naming the Object Page
 Create Manual Trend Log Wizard – Configure Manual Log Page
 Create Trend Log Wizard – Initial Meter Settings Page
 Create Trend Log Wizard – Connect Objects to the Trend Log Page
 Adding a Trend Log Record to a Manual Trend Log
 Trend Units
 Meter Function
 Creating an Extended Trend Log
 Creating a Trend Log List
 Creating a Trend Chart that Monitors a Trend Log Series
