How to
Manually Creating an Archive
You create an archive manually to preserve the historical data on an Enterprise Server on an as-needed basis, such as before a system upgrade.
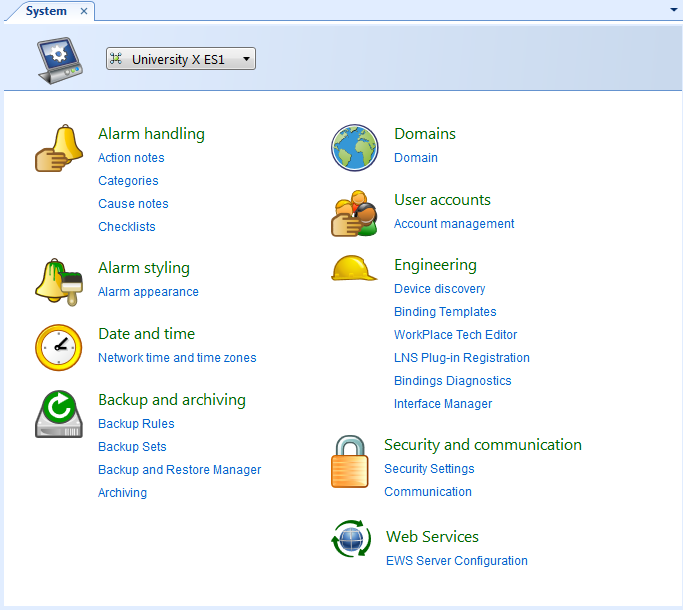
In WorkStation, on the Tools menu, click Control Panel .
On the Control Panel toolbar, select the Enterprise Server.
action_zoom_plus_stroke 
Click Archiving.
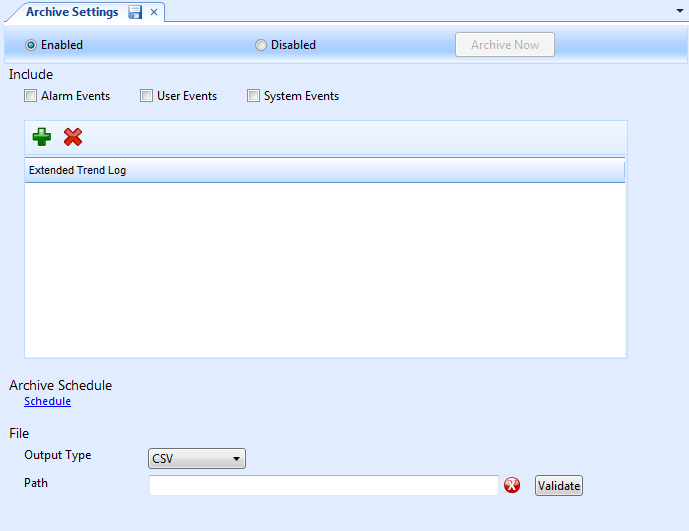
Under Archive Settings , click Enabled .
action_zoom_plus_stroke 
Select the events that you want to include in the archive:
Alarm Events . Select to include high priority or off-normal events (providing the alarms are pre-configured and active on the system.)
User Events . Select to include user-initiated events, such as value overrides or configuration changes.
System Events . Select to include device-initiated events, such as time stamps.
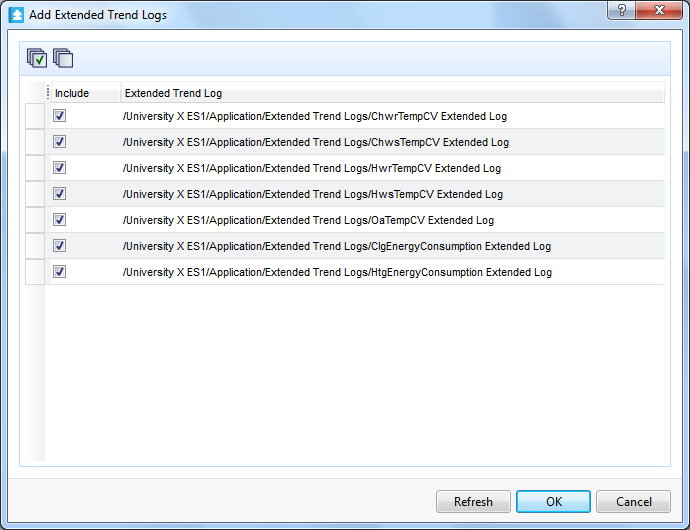
Click the Add extended trend logs button
to add extended trend logs to the archive.action_zoom_plus_stroke 
In the Include column, select the extended trend logs and click OK .
action_zoom_plus_stroke 
In the Output Type box, select the format you want to use for the archive:
CSV . This output generates data separated by a delimiter.
XML . This output generates data using a standard internet protocol.
In the Path box, type the path to an existing folder or server where you want to store the archive files.
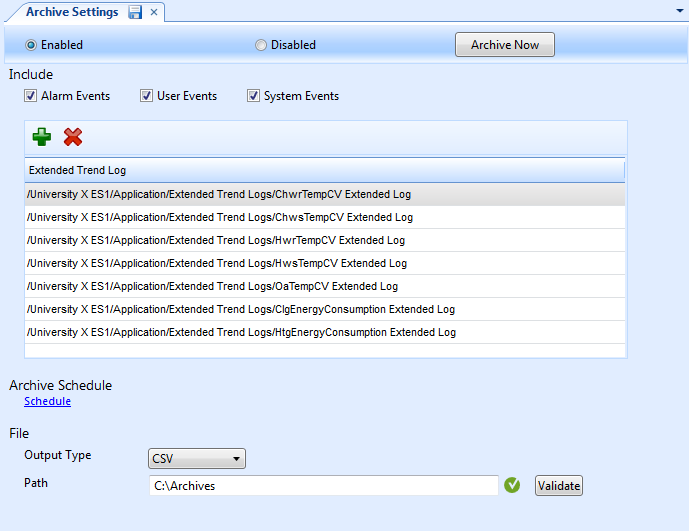
Click Validate to confirm that the path is valid on the system.
A check mark
displays if the system successfully validates the path.action_zoom_plus_stroke 
action_zoom_plus_stroke 
Click the Save button
.action_zoom_plus_stroke 
Click Archive Now .
The archive is saved to the specified path.
 Manual and Scheduled Archiving
 Archiving Formats and Storage
 Archive Folders, Files, and Names
 Removing Events from the Archive
 Removing Extended Trend Logs from the Archive
 Archive Settings Manager Dialog Box
 Add Extended Trend Logs Dialog Box
 Actions Menu – Actions Submenu