How to
Creating a One Time Only Report Schedule
You create a one time only report schedule when you want the schedule to run once on a specified day and time. You can only schedule dashboard reports.
In WebReports, on the menu bar, click Schedules .
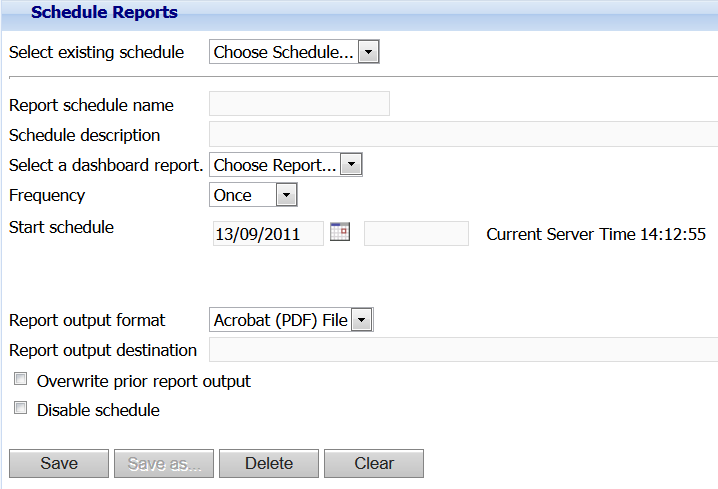
In the Select existing schedule box, select New schedule .
action_zoom_plus_stroke 
In the Report schedule name box, type a name for the schedule.
In the Schedule description box, type a description for the schedule.
In the Select a dashboard report box, select the dashboard report that you want to schedule.
In the Frequency box, select Once .
In the Start schedule box, enter the date and time that you want the schedule to run.
In the Report output format box, select the file format to be used when the report is generated.
In the Report output destination box, enter the directory path for the report.
Important:The report is written to the specified destination using the System account of the Reports Server. If you plan to save scheduled reports to a network drive, ensure that the System account has write access to the network drive.
Select the Overwrite prior report output box to keep only the most current copy of the report output.
Clear the Disable schedule box.
Click Save .
 Schedules for Dashboard Reports
 Report Schedule Frequency
 Schedule Reports Page
 Creating a Daily Report Schedule
 Creating a Weekly Report Schedule
 Creating a Monthly Report Schedule
 Editing a Report Schedule
 Disabling a Report Schedule
 Deleting a Report Schedule