Log on to rate and give feedback
1
2
3
4
5
Log on to rate
0

Modalità
Prodotti:
WebStation
Funzionalità:
Tendenza
Versione del prodotto:
2.0, 2.1, 3.0, 3.1, 3.2, 3.3, 2022, 2023
22/07/2018
Configurazione dell'asse X in base a un intervallo di tempo assoluto
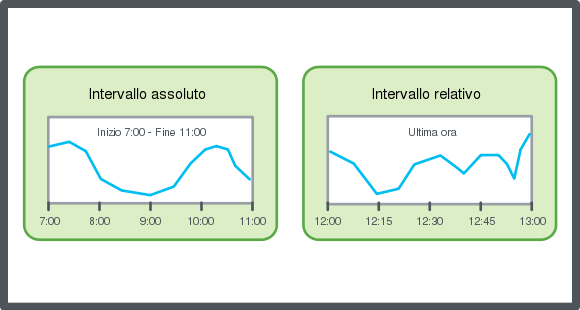
Puoi configurare l'intervallo di tempo di un asse X di un grafico di Trend affinché visualizzi le voci registrate in un periodo di tempo specifico.
Per configurare l'asse X in base a un intervallo di tempo assoluto
In WebStation, nel riquadro Struttura di sistema , seleziona il grafico di trend da configurare.
Sulla barra degli strumenti Grafico di Trend , fai clic sul pulsante Impostazioni
.action_zoom_plus_stroke 
Nella finestra di dialogo Impostazioni , fai clic sulla scheda asse X .
Nella casella Modalità ora , seleziona Assoluto (Ora di inizio e di fine) .
Nella casella Ora di inizio , inserisci la data e l'ora più a sinistra dell'asse X.
Fai clic su OK .
Fai clic su Salva .
L'asse X è configurato in base a un intervallo di tempo assoluto.
 Assi dei grafici del Trend in WebStation
 Configurazione dell'asse X in base a un intervallo di tempo relativo
 Visualizzazione delle linee della griglia di un grafico del Trend
 Configurazione manuale della scala dell'asse Y
 Configurazione automatica della scala dell'asse Y
 Salvataggio delle impostazioni attuali di un grafico del Trend
 Visualizzazione di un grafico del Trend
 Trend Chart Toolbar
 Finestra di dialogo Impostazioni grafico del Trend – Scheda Asse X


